This topic describes a typical method that creates a template spreadsheet by ReoGridEditor and show in .NET application with ReoGrid control.
Excel file format support
From the version 0.8.8, it’s also possible to make template spreadsheet by Excel instead of ReoGridEditor, Excel file can be also displayed by ReoGrid 0.8.8. For details see the Excel file format support.
Make template spreadsheet by ReoGridEditor
When you need to use ReoGrid to show a spreadsheet in .NET Application, the following steps is one of recommended practice for doing that:
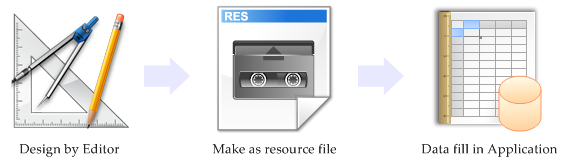
- Design a template of spreadsheet by using ReoGrid Editor
- Save as XML
- Make as project resource
- Load in .NET Application
- Fill data
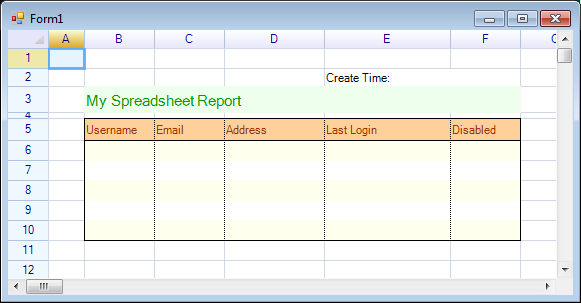
1. Design a template by using ReoGrid Editor
Download the release package and run ReoGridEditor.exe
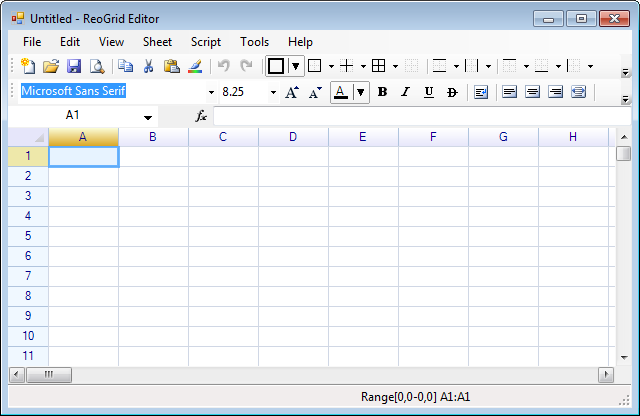
By using this editor it is possible to design a spreadsheet template, such as text template, setting borders and cell styles, as well as formulas of cell, merged cells and printing settings. It is typically used to build a template spreadsheet for ReoGrid applications.
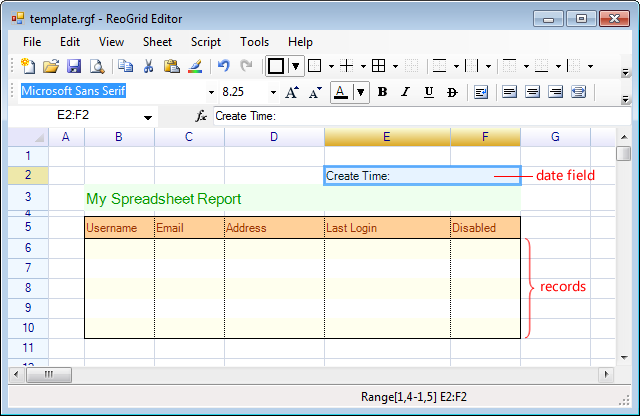
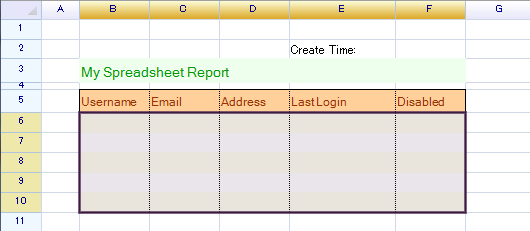
Here is an example of finished template:
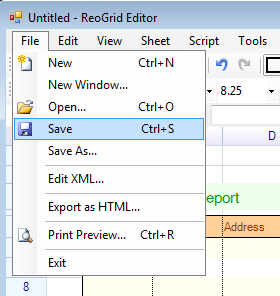
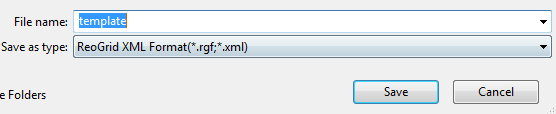
2. Save as XML
Select the menu ‘File’ -> ‘Save’ or press ‘Save’ button on toolbox, to save this spreadsheet as ReoGrid XML format.
Input a file name:
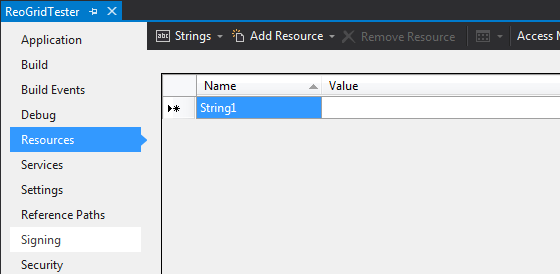
3. Make as project resource
- Open Visual Studio, create a new project or open your project
- Add references of ReoGrid (see how to install)
- Switch to ‘Resource’ tab in the project property window
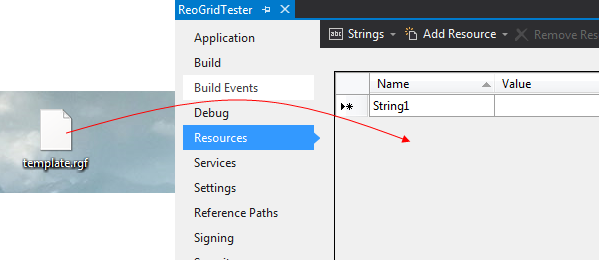
- Drag the file which was saved in step 2 into the resource list:
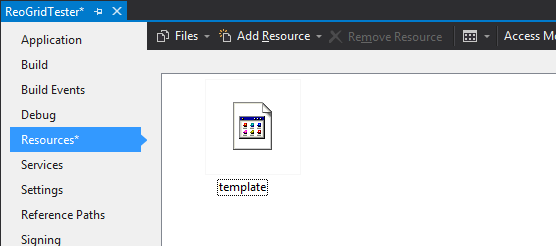
Result:
4. Load in .NET Application
Create a new windows form, put an instance of ReoGrid onto it.
Rename the instance of ReoGrid control to ‘grid’, and write the following code in the Form_Load event:
using (var ms = new System.IO.MemoryStream(
  ReoGridTester.Properties.Resources.template))
{
  grid.Load(ms, IO.FileFormat.ReoGridFormat);
}
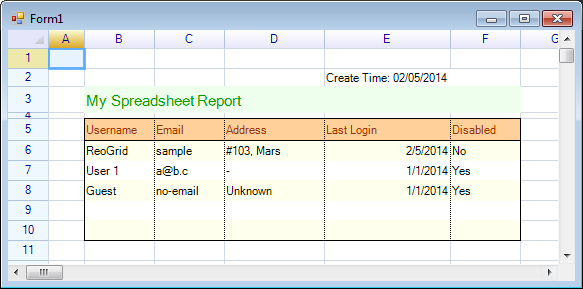
The Load method reads all data of template spreadsheet from resource binary stream. By running the application, the form shows like below:
5. Fill data
Continue to append some code in Form_Load event in order to fill data:
// get first worksheet instance
var sheet = grid.CurrentWorksheet;
// fill records
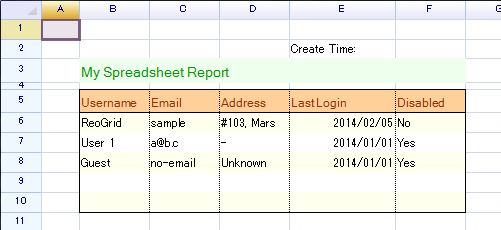
sheet["B6"] = new object[,] {
{ "ReoGrid", "sample", "#103, Mars", "02/05/2014", "No" },
{ "User 1", "a@b.c", "-", "01/01/2014", "Yes" },
{ "Guest", "no-email", "Unknown", "01/01/2014", "Yes" }
};
// fill create time
sheet["E2"] = "Create Time: " + DateTime.Now.ToString("MM/dd/yyyy");
Run program:
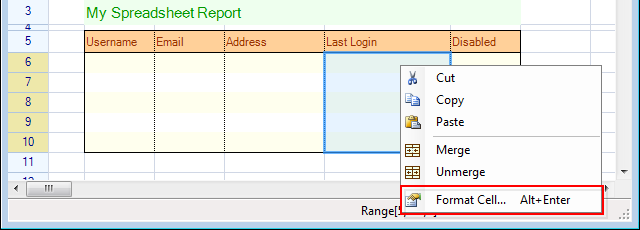
Presetting cells format
It is also possible to specify how to format cells data when spreadsheet is displayed in Application.
1. Open Editor, Right click on target cell or range, choose ‘Format Cells…’
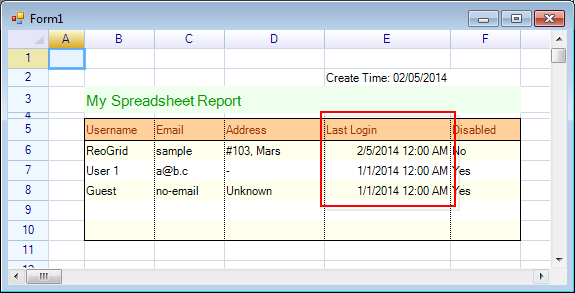
2. Choose ‘Format’ tab, select ‘DateTime’, select ‘7/13/1980 12:00 AM’ pattern
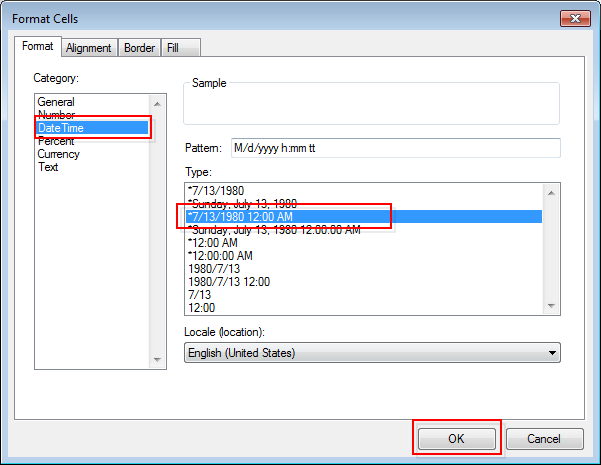
3. Click ‘OK’
4. Save template
5. Update embed resource in project
6. Run program
The cells formatted and displayed as below:
Define named range
A good idea is to define a range with a given name. A named range helps to locate where the data to be filled.
1. Select a range on spreadsheet in Editor:
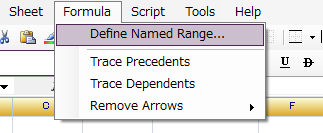
2. By keeping the selection range, and select menu ‘Formula’ -> ‘Define named range…’
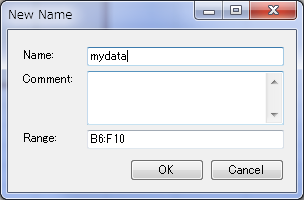
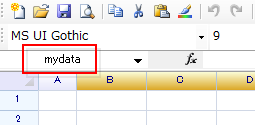
3. Input ‘mydata’ as name, then click ‘OK’
4. The name will be displayed at the address field in left top of editor.
5. Save this template, and refresh the resource template which exists in your project.
6. Change the code to use named range in order to filling data:
// filling data with named range
sheet["mydata"] = new object[,] {
  { "ReoGrid", "sample", "#103, Mars", "02/05/2014", "No" },
  { "User 1", "a@b.c", "-", "01/01/2014", "Yes" },
  { "Guest", "no-email", "Unknown", "01/01/2014", "Yes" }
};
The spreadsheet will be shown like below:
[…] See how to create a template to show spreadsheet on windows form. […]