This topic describes a typical workflow for creating a template spreadsheet with ReoGridEditor and displaying it in a .NET application with the ReoGrid control.
Using an Excel file as a Template
It is also possible to create a template spreadsheet using Microsoft Excel instead of ReoGridEditor. Excel files can also be displayed by ReoGrid. For details, see the Excel file format.
Make a template spreadsheet with ReoGridEditor
When you need to use ReoGrid to display a spreadsheet in a .NET application, the following steps represent a recommended practice:
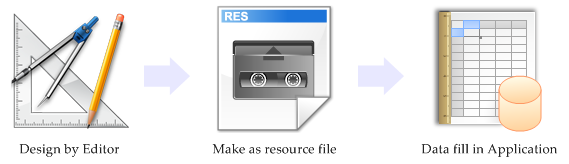
- Design a spreadsheet template using ReoGrid Editor
- Save as XML
- Add as a project resource
- Load in the .NET application
- Fill in data
1. Design a template using ReoGrid Editor
Download the release package and run ReoGridEditor.exe.
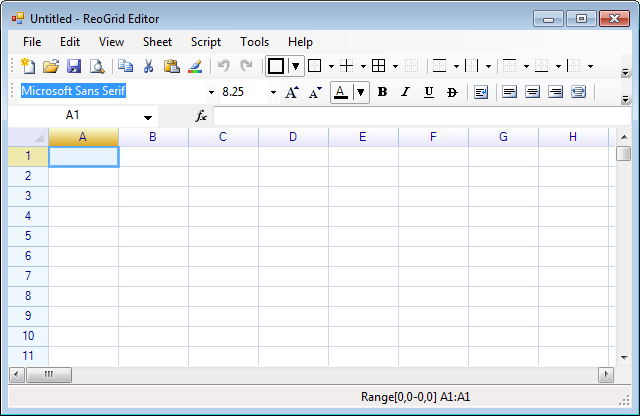
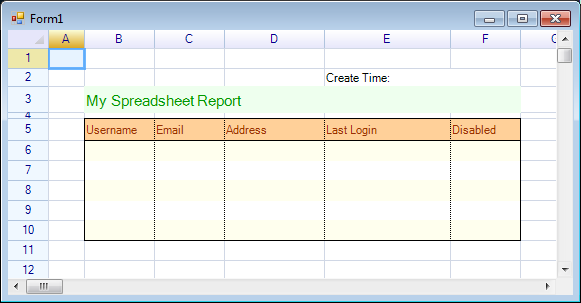
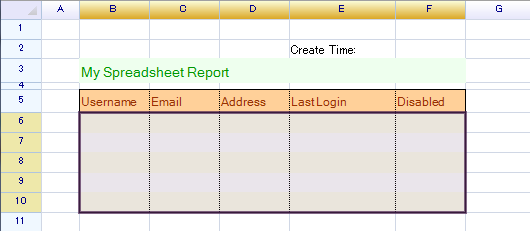
Using this editor, you can design a spreadsheet template with text, borders, cell styles, formulas, merged cells, and print settings. It is typically used to build a template spreadsheet for ReoGrid applications.
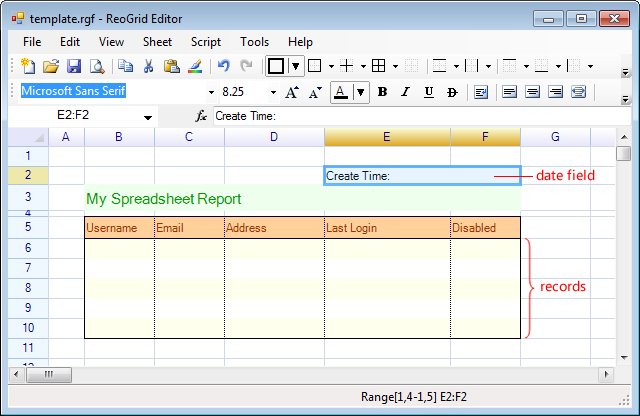
Here is an example of a finished template:
2. Save as XML
Select the menu ‘File’ -> ‘Save’ or press the ‘Save’ button on the toolbar to save this spreadsheet in ReoGrid XML format.
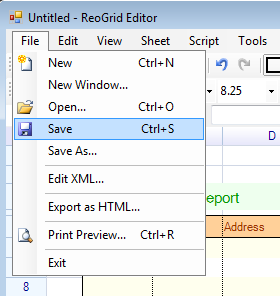
Enter a file name:

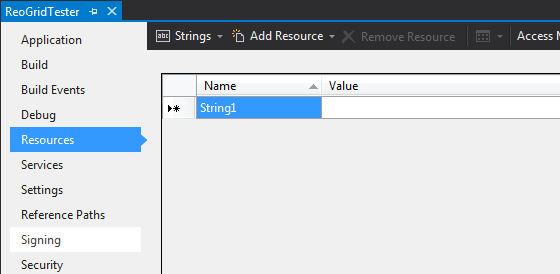
3. Add as a project resource
- Open Visual Studio, and create a new project or open your existing project.
- Add references to ReoGrid (see installation).
- Switch to the ‘Resource’ tab in the project properties window.
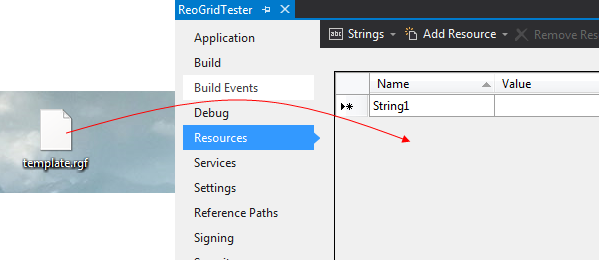
- Drag the file saved in step 2 into the resource list:
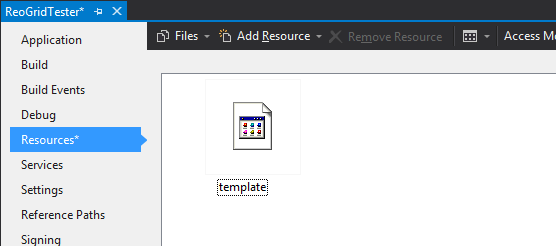
Result:
4. Loading the template file
Create a new Windows form and place a ReoGrid instance on it. Rename the ReoGrid control instance to ‘grid’, and write the following code in the Form_Load event:
using (var ms = new System.IO.MemoryStream(
ReoGridTester.Properties.Resources.template))
{
grid.Load(ms, IO.FileFormat.ReoGridFormat);
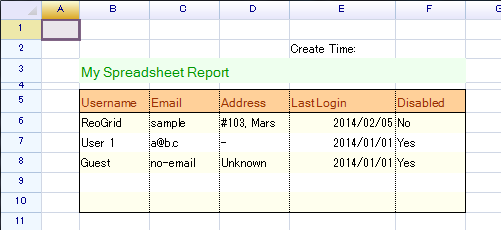
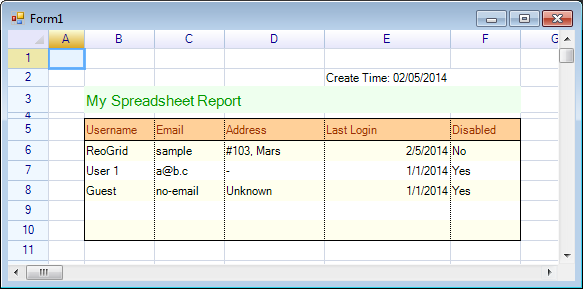
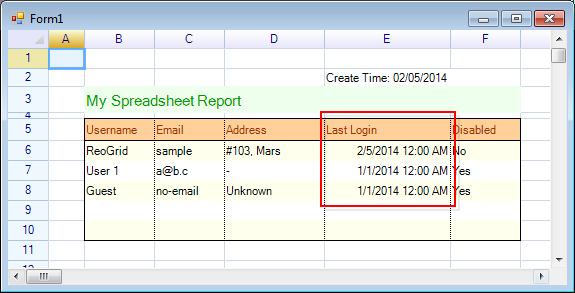
}The grid.Load method reads all data from the template spreadsheet from the resource binary stream. Running the application shows the form as below:
5. Fill in data
Continue by adding code in the Form_Load event to fill in data:
// get first worksheet instance
var sheet = grid.CurrentWorksheet;

// fill records
sheet["B6"] = new object[,] {
  { "ReoGrid", "sample", "#103, Mars", "02/05/2014", "No" },
  { "User 1", "[email protected]", "-", "01/01/2014", "Yes" },
  { "Guest", "no-email", "Unknown", "01/01/2014", "Yes" }
};

// fill create time
sheet["E2"] = "Create Time: " + DateTime.Now.ToString("MM/dd/yyyy");
Run the program:
Presetting cell formats
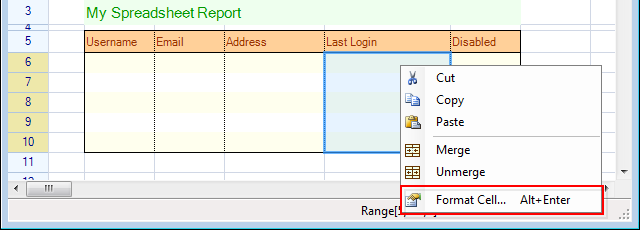
It is possible to specify the cell data format in the template file.
- Open the Editor, right-click on the target cell or range, and choose ‘Format Cells…’
- Choose the ‘Format’ tab, select ‘DateTime’, and select the ‘7/13/1980 12:00 AM’ pattern.
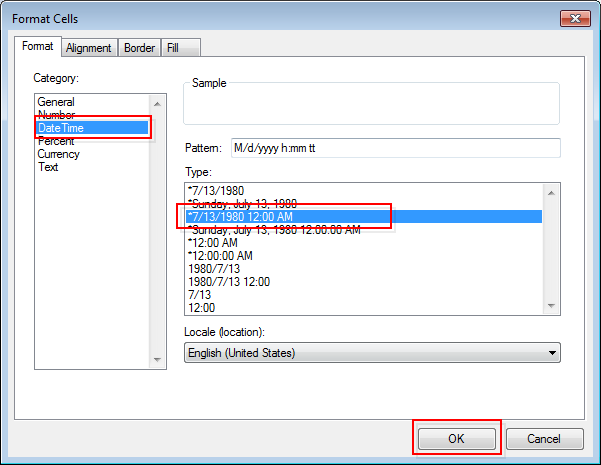
- Click ‘OK’.
- Save the template. 5. Update the embedded resource in the project. 6. Run the program. The cells are formatted and displayed as below:
Define a named range
A good practice is to define a range with a given name. A named range helps identify where data should be filled.
-
Select a range on the spreadsheet in the Editor:
-
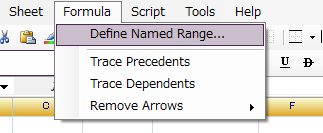
With the selection active, select the menu ‘Formula’ -> ‘Define named range…’
-
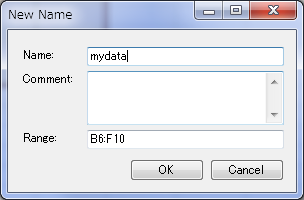
Enter ‘mydata’ as the name, then click ‘OK’.
-
The name will be displayed in the address field at the top-left of the editor.

-
Save this template and refresh the resource template in your project.
-
Update the code to use the named range for filling data:
// filling data with named range
sheet["mydata"] = new object[,] {
  { "ReoGrid", "sample", "#103, Mars", "02/05/2014", "No" },
  { "User 1", "[email protected]", "-", "01/01/2014", "Yes" },
  { "Guest", "no-email", "Unknown", "01/01/2014", "Yes" }
};
The spreadsheet will be displayed as below: