リッチフォーマットテキストは以下のクラスで表現されます。
unvell.ReoGrid.Drawing.RichTextリッチフォーマットテキストはセルまたはフローティングオブジェクトに追加すると、表示および印刷できます。
セル内のリッチフォーマットテキストの表示
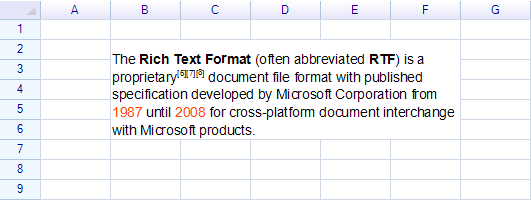
上記の例のコード:
using unvell.ReoGrid.Drawing;

var sheet = grid.CurrentWorksheet;

sheet.MergeRange("B2:F6");

sheet["B2"] = new RichText()
  .Regular("The ")
  .Bold("Rich Text Format")
  .Regular(" (often abbreviated ")
  .Bold("RTF")
  .Regular(") is a proprietary")
  .Superscript("[6][7][8]")
  .Regular(" document file format with published specification developed by Microsoft Corporation from ")
  .Span("1987", textColor: Color.OrangeRed)
  .Span(" until ", textColor: Color.Black)
  .Span("2008", textColor: Color.OrangeRed)
  .Span(" for cross-platform document interchange with Microsoft products.", textColor: Color.Black);
改行
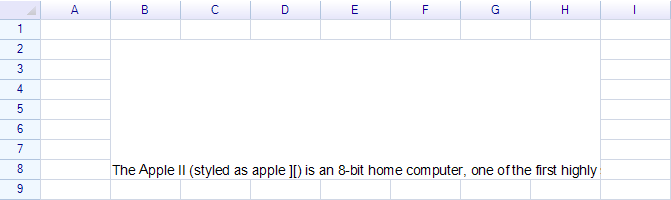
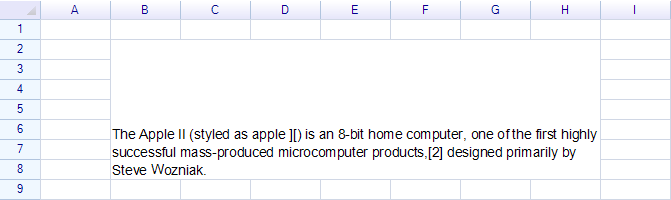
セルスタイルを設定してワードブレークまたはブレークオールの折り返しを有効にします。
例: ワードブレークなしのテキスト
例: ワードブレーク付きのテキスト
コード:
sheet.Cells["B2"].Style.TextWrap = TextWrapMode.WordBreak;テキスト配置
セルの水平および垂直配置スタイルを設定して、リッチテキストの配置を変更します。
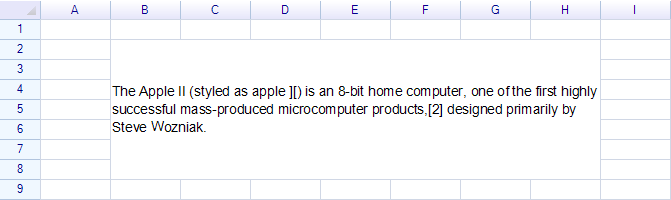
コード:
sheet.Cells["B2"].Style.VAlign = ReoGridVerAlign.Middle;テキスト配置を右に設定:
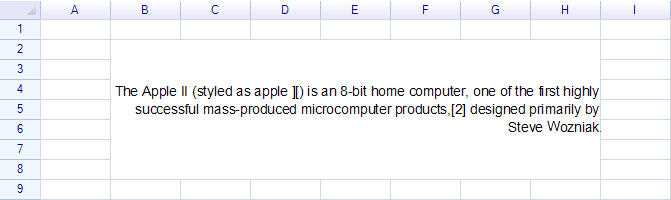
コード:
sheet.Cells["B2"].Style.HAlign = ReoGridHorAlign.Right;ReoGridリッチテキスト構造
シンプルなテキスト例
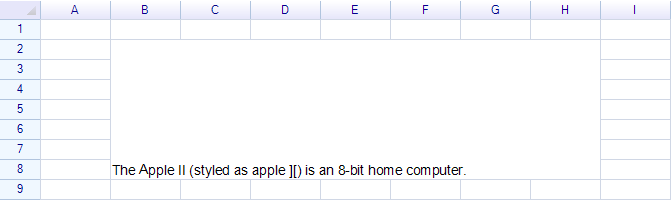
Span メソッドを使用して、スタイルを指定せずにテキストを追加します。例えば:
sheet["B2"] = new RichText()
.Span("The Apple II (styled as apple ][) is an 8-bit home computer.");テキストスタイルを変更する最も簡単な方法は、Bold、Italic、Regular などのメソッドを使用することです。
太字
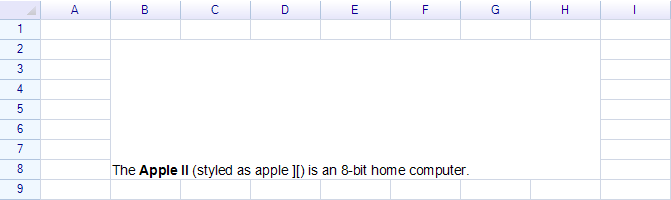
コード:
sheet["B2"] = new RichText()
  .Span("The ")
  .Bold("Apple II")
  .Regular(" (styled as apple ][) is an 8-bit home computer.");
Bold メソッドを使用してテキストを太字にし、Regular メソッドを使用してデフォルトのテキストスタイルに戻します。
斜体と下線の使い方は太字と同じです。取り消し線には .Span("text", fontStyles: FontStyles.Strikethrough) を使います。
段落の追加(改行)
改行を挿入するには、NewLine メソッドを使用します。
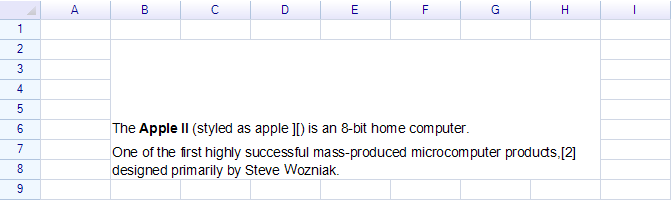
コード:
sheet["B2"] = new RichText()
  .Span("The ")
  .Bold("Apple II")
  .Regular(" (styled as apple ][) is an 8-bit home computer.")
  .NewLine()
  .Span("One of the first highly successful mass-produced microcomputer products,[2] designed primarily by Steve Wozniak.");
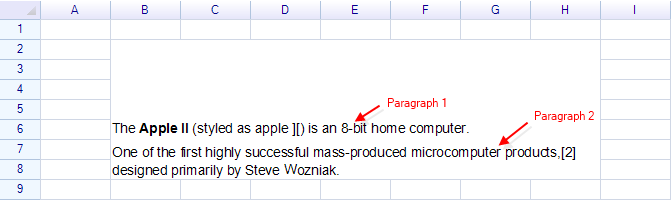
段落間隔と行の高さ
NewLine メソッドはリッチテキストに新しい段落を追加します。
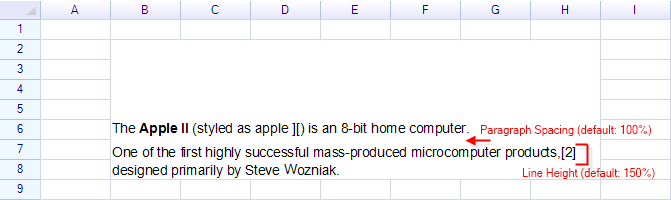
段落間隔と行の高さを変更することができます。
SetStyles メソッドを使用して、段落またはスパンの現在のスタイルを変更します。
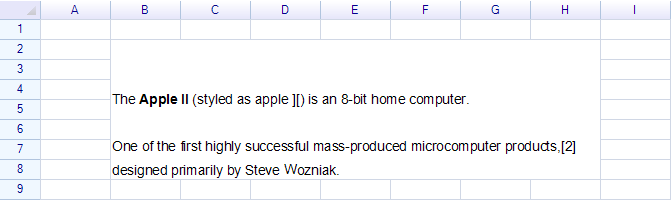
コード:
sheet["B2"] = new RichText()
  .SetStyles(paragraphSpacing: 3.0f)
  .Span("The ")
  .Bold("Apple II")
  .Regular(" (styled as apple ][) is an 8-bit home computer.")
  .NewLine()
  .SetStyles(lineHeight: 2.0f)
  .Span("One of the first highly successful mass-produced microcomputer products,[2] designed primarily by Steve Wozniak.");
SetStyles メソッドは現在の段落またはスパンのスタイルを変更します。最初の SetStyles 呼び出しは最初の段落の段落間隔を変更します。NewLine が呼び出された後、2番目の SetStyles 呼び出しは2番目の段落の行の高さを変更します。
注意: Excelは段落間隔と行の高さスタイルの調整をサポートしていません。
段落ごとの水平配置
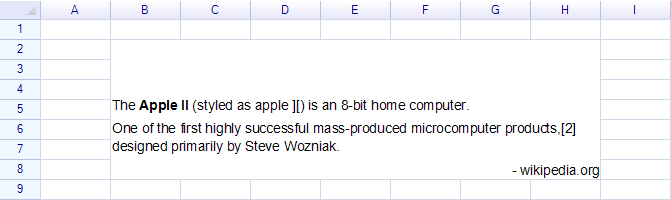
コード:
sheet["B2"] = new RichText()
  .Span("The ")
  .Bold("Apple II")
  .Regular(" (styled as apple ][) is an 8-bit home computer.")
  .NewLine()
  .Span("One of the first highly successful mass-produced microcomputer products,[2] designed primarily by Steve Wozniak.")
  .NewLine()
  .SetStyles(halign: ReoGridHorAlign.Right)
  .Span("- wikipedia.org");
注意: Excelは段落(行)ごとの配置スタイルをサポートしていません。
上付き文字と下付き文字
上付き文字を作成するには、Superscript メソッドを使用します。
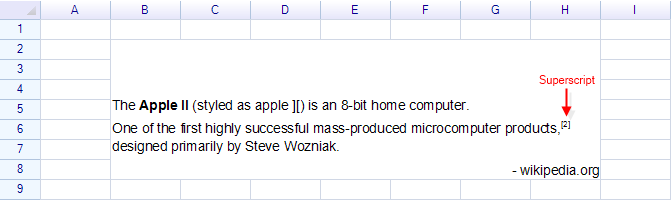
コード:
sheet["B2"] = new RichText()
  .Span("The ")
  .Bold("Apple II")
  .Regular(" (styled as apple ][) is an 8-bit home computer.")
  .NewLine()
  .Span("One of the first highly successful mass-produced microcomputer products,")
  .Superscript("[2]")
  .Regular(" designed primarily by Steve Wozniak.")
  .NewLine()
  .SetStyles(halign: ReoGridHorAlign.Right)
  .Span("- wikipedia.org");
注意:
Superscriptメソッドを使用した後、Regularメソッドを使用してデフォルトのテキストスタイルに戻します。
セル内エディタでリッチテキストを編集
v4.6 から、セル内エディタ(WinForms・WPF)はセルのリッチテキストを直接編集します。編集中に文字の一部を選んで Ctrl+B・Ctrl+I・Ctrl+U を押すと、その部分だけを太字・斜体・下線にできます。
編集を確定すると、書式が混在する文字は RichText として保存し、全体が同じ書式の文字は通常の文字列とセルのスタイルとして保存します(Excel と同じ)。
アプリの UI から選択中の文字に書式を適用
Worksheet.ApplyStyleToEditingTextSelection は、エディタ内で選択している文字にフォント名・サイズ・フォントスタイル・文字色を適用します。書式がセル全体に属する場合(編集していない、文字を選択していない、同じ書式の文字をすべて選択している、数式である)は false を返すので、ツールバーはその場合に選択中のセルへ書式を適用できます。
using unvell.ReoGrid;
using unvell.ReoGrid.Actions;
using unvell.ReoGrid.Graphics;

void ApplyTextStyle(WorksheetRangeStyle style)
{
  var sheet = grid.CurrentWorksheet;

  // セル内エディタで選択している文字に適用した
  if (sheet.ApplyStyleToEditingTextSelection(style)) return;

  // それ以外は選択中のセルに適用する
  grid.DoAction(new SetRangeStyleAction(sheet.SelectionRange, style));
}

// 例: カラーピッカーから
ApplyTextStyle(new WorksheetRangeStyle
{
  Flag = PlainStyleFlag.TextColor,
  TextColor = SolidColor.Red,
});
書式を変えても編集は続きます。カラーピッカーのようなツールバーのドロップダウンにフォーカスがある間も同じです。
注意: セル内エディタの中での Ctrl+Z(以前のテキストボックスのエディタが持っていた 1 段階の元に戻す)は、現時点では未対応です。
RichText を文字位置で編集
v4.6 から、RichText には既存の文字列を文字位置で変更するメソッドがあります。改行は 1 文字として数えます。
| メソッド | 説明 |
|---|---|
InsertText(int offset, string text) | 指定位置に文字列を挿入します。書式はその位置の文字を引き継ぎます。\n で新しい段落になります |
DeleteRange(int start, int length) | 指定範囲の文字を削除します。段落をまたいでも削除できます |
SetFontStyle(int start, int length, FontStyles style, bool on) | 指定範囲のフォントスタイルをオン・オフします。ほかのスタイルは保持します |
SetTextColor(int start, int length, SolidColor color) | 指定範囲の文字色を設定します |
IsFontStyleApplied(int start, int length, FontStyles style) | 指定範囲のすべての文字にそのスタイルが付いているときに true を返します |
using unvell.ReoGrid.Drawing;
using unvell.ReoGrid.Drawing.Text;
using unvell.ReoGrid.Graphics;

var text = new RichText().Regular("Monthly report");

text.InsertText(0, "Draft: ");
text.SetFontStyle(0, 5, FontStyles.Bold, true);
text.SetTextColor(0, 5, SolidColor.Red);

sheet["B2"] = text;
描画オブジェクト内のリッチフォーマットテキストの表示
描画オブジェクト内にリッチフォーマットテキストを表示するには、RichText クラスのインスタンスを作成し、テキストを追加してから、描画オブジェクトに割り当てます。
Excelインポート/エクスポートのサポート
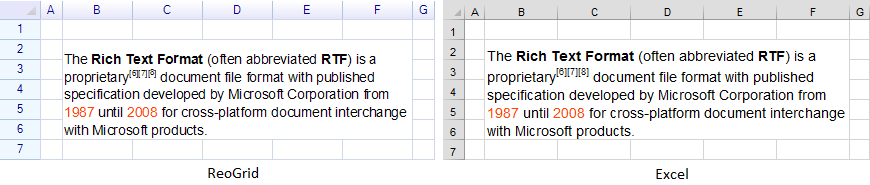
ReoGridはExcelファイルからのリッチフォーマットテキストのインポートとエクスポートをサポートしています。以下の例は、ReoGridとExcelの両方で表示されるテキストを示しています。