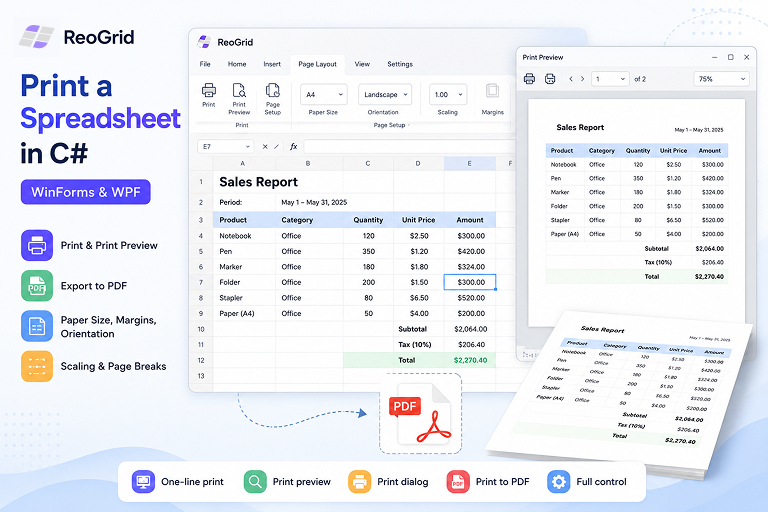
Printing is the step where a lot of “we’ll just use a DataGridView” projects fall apart. Getting tabular data onto the screen is easy; getting it onto paper — paginated, scaled to fit, with the right margins and a sensible page break — is where you end up hand-rolling PrintDocument and measuring strings with Graphics.MeasureString.
If your data already lives in a spreadsheet control, you skip all of that. This article shows how to print a worksheet from a .NET app: a one-line print, a preview dialog, the system print dialog, printing straight to PDF, and the paper/margin/scaling knobs you’ll actually reach for. The examples use ReoGrid, but the shape applies to any real spreadsheet component.
The core: a print session
ReoGrid prints through a print session. You create one from a worksheet (to print that sheet) or from the control (to print the whole workbook), then call Print():
// Print the current worksheet with default settings
var session = sheet.CreatePrintSession();
session.Print();
That single call handles pagination, the printable range, scaling, and sending the job to the default printer. Everything else in this article is about controlling what that session does.
Before printing, ReoGrid auto-detects the used range and pages the sheet to fit the paper — so even with zero configuration, CreatePrintSession().Print() produces a sensible result.
Print preview
Most apps want to show the user a preview first. The print session exposes a standard System.Drawing.Printing.PrintDocument, so you hand it to the built-in PrintPreviewDialog:
var sheet = reoGridControl1.CurrentWorksheet;

using (var session = sheet.CreatePrintSession())
using (var ppd = new PrintPreviewDialog())
{
    ppd.Document = session.PrintDocument;
    ppd.SetBounds(200, 200, 1024, 768);
    ppd.PrintPreviewControl.Zoom = 1d;
    ppd.ShowDialog(this);
}
The preview honors every setting below — paper size, margins, orientation, scaling, grid lines — so what the user sees is what prints.
The system print dialog (let the user pick a printer)
To show the familiar Windows print dialog with printer selection, copies, and page range, drive a PrintDialog with the same PrintDocument:
var doc = sheet.CreatePrintSession().PrintDocument;

using (var pd = new System.Windows.Forms.PrintDialog())
{
    pd.Document = doc;
    pd.UseEXDialog = true;   // needed on 64-bit Windows

    if (pd.ShowDialog() == DialogResult.OK)
    {
        doc.PrinterSettings = pd.PrinterSettings;
        doc.Print();
    }
}
This is the “File ▸ Print…” experience users expect, with no custom UI on your side.
Print straight to PDF (no PDF library)
A surprising amount of “print” really means “give me a PDF to email.” You don’t need a PDF library — Windows ships a virtual printer. Point the session at it by name:
sheet.PrintSettings.PrinterName = "Microsoft Print to PDF";
sheet.CreatePrintSession().Print();
The job renders to a .pdf instead of paper. Set PrinterName back to null to use the system default printer again. The same trick works with any installed virtual printer (e.g. a third-party PDF driver) — it’s just a printer name.
Choosing what to print
A print session defaults to the current worksheet, but you can print the whole workbook or a specific set of sheets.
Single worksheet:
var session = worksheet.CreatePrintSession();
session.Print();
Entire workbook (all sheets):
var session = reoGridControl.CreatePrintSession();
session.Print();
Specific sheets, in a specific order:
var session = reoGridControl.CreatePrintSession();
session.Worksheets.Clear();
session.Worksheets.Add(grid.Worksheets["Summary"]);
session.Worksheets.Add(grid.Worksheets["Details"]);
session.Print();
This is how you produce a multi-document job — say a receipt plus an office copy — from one workbook. See the receipt generator article for that pattern end to end.
Setting the printable range
By default ReoGrid prints the used range. To print only part of the sheet, set PrintableRange:
sheet.PrintableRange = new RangePosition(1, 1, 9, 9); // row, col, rows, colsAnything outside the printable range is omitted. If the range is wider or taller than the paper, ReoGrid splits it across pages automatically.
Paper size, orientation, and margins
Page setup lives on sheet.PrintSettings:
// Paper size — must match a key in PaperManager.PaperSizesInch
sheet.PrintSettings.PaperName = "A4";        // "A3", "A5", "Letter", "Legal", "JIS_B4"…

// Orientation
sheet.PrintSettings.Landscape = true;

// Margins, in inches
sheet.PrintSettings.Margins = new PageMargins(1f);              // all sides = 1"
sheet.PrintSettings.Margins = new PageMargins(0.5f, 0.5f, 1f, 1f); // T, B, L, R
For a custom paper size, set PaperName = "Custom" and provide the dimensions:
sheet.PrintSettings.PaperName   = "Custom";
sheet.PrintSettings.PaperWidth  = 6.0f;   // inches
sheet.PrintSettings.PaperHeight = 9.0f;   // inches
ReoGrid knows the ISO A/B/C series, JIS B series, and the North American sizes, so you rarely need "Custom".
Scaling to fit
When a sheet is a bit too wide, scale it down instead of letting a few columns spill onto a second page:
sheet.PrintSettings.PageScaling = 0.7f; // print at 70%Changing the scale re-pages the worksheet automatically. Valid range is roughly 0.1–4.0 (10%–400%).
Page breaks: where the paper splits
ReoGrid inserts system page breaks (dashed lines) automatically to fit the paper. You can add your own user page breaks (solid lines) to force a split:
sheet.ColumnPageBreaks.Add(5);   // start a new page at column 5
sheet.RowPageBreaks.Add(40);     // and at row 40
To re-run automatic pagination at any point — for example after you’ve changed the data or the paper size:
sheet.AutoSplitPage();And to wipe all user breaks and start clean:
sheet.ResetAllPageBreaks();If you want to show the page breaks on screen so users can see where pages divide:
sheet.EnableSettings(WorksheetSettings.View_ShowPageBreaks);Printing grid lines
By default the cell grid is not printed — you get only the borders you applied. To include the grid lines (handy for raw data dumps):
sheet.PrintSettings.ShowGridLines = true;Knowing the page layout before you print
Sometimes you need to know how the sheet will paginate — to show a page count, or to stamp “Page 1 of N”. Iterate the print pages:
sheet.IteratePrintPages(range =>
{
    Console.WriteLine("Page range: " + range.ToAddress());
    return true;   // return false to stop early
});
Each callback gives you the cell range that lands on one page.
PrintSettings at a glance
| Property | Type | Default | Purpose |
|---|---|---|---|
PrinterName | string | null | Target printer (null = system default; "Microsoft Print to PDF" for PDF) |
PaperName | string | "Letter" | Paper size key ("A4", "Legal", "Custom"…) |
Landscape | bool | false | Landscape orientation |
Margins | PageMargins | 1f all sides | Page margins, in inches |
PageScaling | float | 1f | Scale factor (0.1–4.0) |
PageOrder | PrintPageOrder | DownThenOver | Pagination direction for multi-page sheets |
ShowGridLines | bool | false | Print the cell grid |
Why this beats hand-rolling PrintDocument
If you print a DataGridView yourself, you own all of it: measuring rows, deciding where to break pages, drawing headers on every page, scaling to the margin. It’s a few hundred lines and it’s fragile. A spreadsheet control already is a paginated, formatted document — so printing it is configuration, not implementation. You set paper and margins; it handles the layout.
Where to go next
- Build a Receipt Generator in About 30 Lines of C# — printing applied to a real, complete app
- Paging and Print — full reference — every page-break and print-session API
- Display and Edit an Excel File in a WinForms or WPF App — loading the workbook you’re about to print
- ReoGrid installation guide — NuGet packages and references